Quick, Easy Chicken Curry
I’ve eaten a lot of chicken curry. Restaurant chicken curry as well as home cooked. Home cooked – as in about 200 different homes. I grew up in the land of chicken curry (India) – and then continued eating it when I was in the land of turkey (the US. And yes – Turkey curry is equally delicious).
The College Experience
I went to college in the U.S. Three different colleges actually , some which proudly boasted sub zero temperatures. Chicken curry (with rice and/or tortillas) was more than just a meal. It was a means for survival (since it was quick and nutritious). More importantly, it turned out to be a social event, a good way to keep roommates fed – and also a good way to make new friends (the aroma would draw people to our dorm room door). I turned all my American roommates from ‘mild’ to ‘extra spicy’ in the course of 4 years. I had folks who would beg to take me to the grocery store – so they could buy all the necessary ingredients – if I would only just do the cooking ![]() .
.
Here’s the strange part though. My chicken curry, though edible, was really not that good.
This I know, because since college, I’ve had some REAL , NON-COLLEGE, home cooked curry – and my taste buds know the difference.
The Biggest Difference (between College chicken curry and Grown Up Chicken Curry)
Fresh spices. In college, due to sheer laziness, I would rely on canned (packet) spices. And also on canned tomato puree – instead of fresh tomatoes. Fresh spices and fresh ingredients (tomatoes, yogurt, coriander…etc) make all the difference in the taste. As was to be expected. But they didn’t teach me that at college (I had to learn it all on my own).
A ‘GROWN UP’ version of my college recipe
Having cooked chicken curry in all its different forms, I believe I have settled on ONE recipe that meets the criteria of most people looking to cook chicken curry:
- It is (relatively) quick.
- It is (according to my taste buds) extremely tasty. It optionally has potatoes (or sweet potatoes or taro root) that is as tasty in the curry as the chicken itself.
To Get Started
Gather the following ingredients, supplies.
| Vegetables | Spices | Chicken , Cooking Oil, Yogurt | Utensils, Cookware |
| Potatoes (small – 6-8) | Garam Masala | Organic Drumsticks – skinned (6-8) | Blender |
| Fresh Coriander (1 bunch) | Paprika Powder (or any red chilli) | Plain yogurt | Pressure Cooker – large enough to hold 8 pieces of chicken and 6-8 small potatoes. With enough space left on top so it can pressure cook. |
| Onion (1 large red) | Coriander Powder | Ghee preferably instead of cooking oil (though cooking oil is fine as well). Ghee just tastes better. | Large Bowl (for marinating the chicken) |
| Fresh Roma Tomatoes (4-5) | Large Bay Leaves (2) | ||
| salt | |||
| Turmeric Powder |
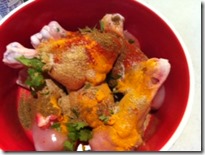
What goes in the bowl?
- Make a large gash in each piece of chicken. This allows the spices to seep in.
- The skinned pieces of chicken, a teaspoon of each of the spices (Garam masala, paprika, coriander, salt and turmeric powder) – – except for the bay leaves.
- Let the bowl sit while you prepare the stuff for the blender.
 |
 |
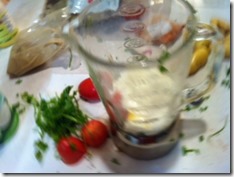
What goes in the blender?
- Coriander leaves (half a bunch). Tear the leaves with your fingers – this releases the juices.
- A cup of yogurt.
- 4-5 Chopped Tomatoes (chop into large pieces – no need to finely dice).
- Blend – until it becomes a gooey greenish white mass (see picture below).
- Leave this aside while you start cooking in the pressure cooker.
 |
 |
What goes into the pressure cooker?
Initially (first 8 minutes)
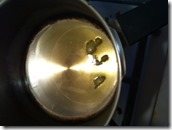
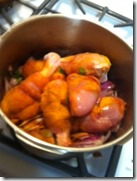
- The Ghee – about 1 large serving spoon (yes – serving spoon). You need this to semi-fry the onions and the chicken.
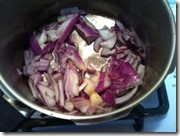
- The chopped onion.
- The marinated chicken in the bowl
- Add a teaspoon of all the spices (Garam masala, paprika, coriander, salt and turmeric powder) again (remember you added them before to the marinate). This time – add the 2 bay leaves as well.
- On a medium flame , fry all the above for about 6-8 minutes.
 |
 |
 |
||
| Add Ghee (Medium Flame) | Add Onions | Add the chicken |
Mid Time (next 6-8 minutes)
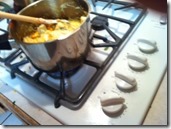
- Add another half-cup of yogurt to the frying chicken and onions.
- Lower the flame – keep on low flame for another 6-8 minutes (IMPORTANT To not HIGH flame the YOGURT).
 |
|
| Add half a cup of yogurt to the pressure cooker. On LOW for another 6 minutes . |
Finally (last 20 minutes)
- Add the potatoes (if you like, make a gash in each just like you did the chicken. Again , to allow spices to seep in).
- Add the gooey blended ingredients from the blender.
- Add half a cup of water (not too much –because the yogurt has a lot of water of its own).
- Stir everything with a large ladle / spoon.
- Cover the pressure cooker – and keep it on low-medium.
- Once it reaches full pressure (should take 10-15 minutes depending on your cooker), lower the flame and let it slowly cook for 5 minutes on low pressure.
- Turn the flame off. Let it sit until the pressure disappears.
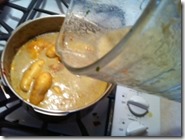 |
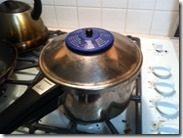 |
 |
|||
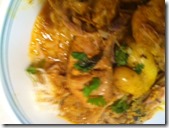
| Add potatoes and blender contents. Add a little water (no more than half a cup). | Let it reach full pressure. Then lower the flame and cook for another 5 minutes. | The Final Product |
Condiments
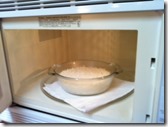
Fresh , basmati rice goes well with chicken curry. Simply add some rice to a microwave safe bowl – add twice the amount of water, a pinch of salt – a pinch of oil (or ghee). Microwave for 15 minutes on high. If you prefer, you can make killer basmati rice in a pressure cooker as well.
Conclusion
The entire process doesn’t take over 35-40 minutes. The end result is a delicious, creamy curry with chicken that is cooked just right. The potatoes are great in the curry as well. Though optional, I heartily recommend adding the potatoes (you can do sweet potatoes or taro root as well – as they sometimes do in India).
Appendix A (Prep Work – 2-3 minutes)
- Chop the onion – dice it into smallish pieces.
- Chop the tomatoes – large pieces.
- Tear apart the coriander leaves to release the juices.
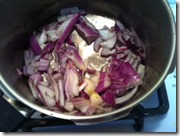 |
Chopped Onions
Leave a Reply