Using Git with Visual Studio 2013
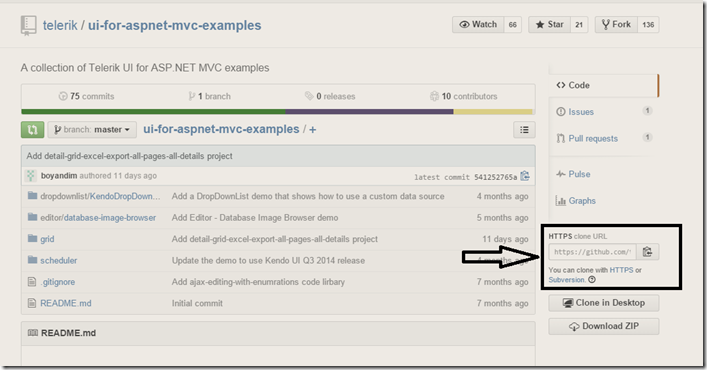
All I wanted to do was look at some sample source code within a GIT repository. For this, the repository exposes a Git URL . This URL is all that is needed to get Visual Studio to CLONE a copy of the project into a LOCAL repository.
So – the first step is to create a LOCAL repository.
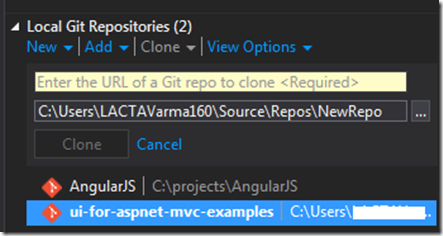
- From within Team Explorer –> Connect (electrical socket icon), you will be shown an option for Local Git Repositories. ‘New’ if you do not have an existing local repository – or Add if you have already have one.

- Once your repository is created, click on CLONE (see above). You will be prompted for a URL. Enter the URL that you found on the GIT page (there should be CLONE url as in the image below). That’s it – Visual Studio will pull in all the source files into your local GIT repository.

Leave a Reply